Halloween Crafts

It’s that time of year!! The weather has cooled, the leaves are falling & everything is pumpkin spice. I can “feel” the spookiness in the air – which can only mean ONE thing.. You guessed it, Halloween! I absolutely LOVE seeing all the Halloween decorations, but now that everyone is using those inflatable and strobe light decorations, it really makes me miss the DIY Halloween crafts families used to make in Halloween’s past.
Decorating your home for Halloween doesn’t have to be a hassle and doesn’t have to break the bank. You can use stuff you already have around the house or use inexpensive items and enjoy some quality time with the kiddos while creating a great Halloween stage. Today, I’m going to show you three pretty cool crafts you can create while still keeping your cool 🙂
Paper Mache Pumpkin
This craft is SUPER EASY, and can be created using a lot of items you probably already have floating around the house. Here’s what you’ll need to mache some paper pumpkins:
- Plastic Bag
- Newspaper or other papers to stuff your bag
- Newspaper or thin paper strips
- Masking tape
- Paint
Step One
First things first, you’ll need to pick out your plastic bag of choice and your stuffing material. Once you’ve decided, it’s time to start stuffing. You can use newspaper or old gift wrap, or whatever paper material you have around the house will work. You’ll want to fill your bag it’s about the same size as you want your pumpkin to be. Play around with pushing the stuffing around from the outside of the bag, until you get the shape you want your pumpkin to be. Once done, you should have something that looks about like the image “Step One” below 🙂

Step Two
Now to get this pumpkin shape looking a little more…. Pumpkiny. Use your tape to start segmenting your pumpkin. After making your first segment, if you aren’t happy with the first segment, feel free to go back and tighten or adjust it to make it tighter. Keep segmenting and sculpting as you do this to get your desired shape.
I know it’s looking a little bare right now, so let’s make this baby look more like the pumpkin it is! Time to give it a stem! Just use a sheet of paper and twist it into a stem shape, cover it in your tape, and then tape it to the top of your pumpkin. By Now, your pumpkin should look like “Step Two” in the images above.
Step Three
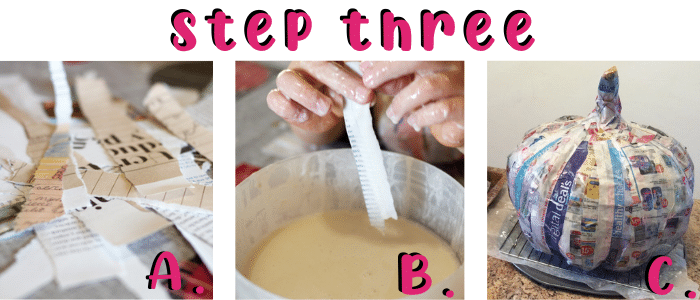
Now let’s get ready to paper mache. Mix your white glue and water, 1 to 1 mixture. It doesn’t really matter where you start, you just want to start on one side and complete that side before moving on. Now let’s get our hands dirty! Dip those thin paper strips and dip them into that gloopy glue mixture. Using two fingers, scrape off the extra mixture and place it on your bag. The thinner the paper the better, this will allow you to build up layers with the paper mache so you can sculpt your shape better. Make sure wherever you start your paper mache, wait until your first section is dry before you flip it over to do the other side, that way you don’t have any flat spots. When finished, your pumpkin should look like the final photo in the “Step 3” image above.
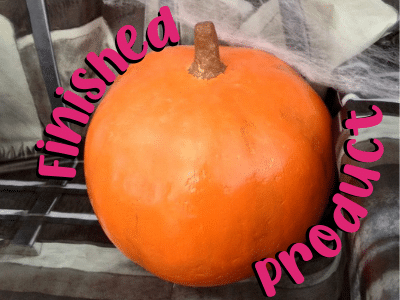
Once your pumpkin is completely dry now it’s time to paint. Here’s your time to shine, be creative, and make your pumpkin FABULOUS!! There are a million and one different ways you can decorate your pumpkin, from “original” to lace coverings – use your imagination and decorate this baby however your heart desires! I’m sure it looks AMAZING & I hope you still have your sanity from doing paper mache with kiddos. Haha. If you are planning to store your pumpkin outside, once it is completely dry, it would probably be best to spray the pumpkin with outdoor clear paint.
Now that you have your beautiful paper mache pumpkin, let’s get to craftin’ on another one of my favorite spooky DIY Halloween crafts . Only this craft is one that I personally am SO thankful is fake and not one single bit real.
Spider sack
A Spider Egg sack bursting with spiders? Spooky, creepy, fun! You only need a couple of items for this one:
- White Pantyhose
- Paper (Toilet Paper, Paper Towels, Newspaper)
- Plastic Spiders
- Hot glue/Hot glue gun
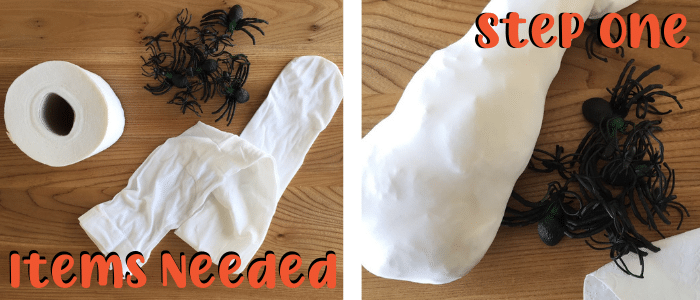
Do you have old white pantyhose laying around, maybe ones that have a run in them? Let’s put those to use! Start by cutting the legs off of the pantyhose. To make your egg sack shape, you can use anything that has a spherical shape (a ball you have lying around or the right shaped rock). Wrap whatever you decide to use in white paper towels, newspaper, or even a white towel, anything to get rid of the color and make it teardrop-ish. Now take that and slide it all the way to the toe of the pantyhose. Slide a couple of your plastic spiders in there too, making it look like you are spiders still trying to get out of the egg sack.
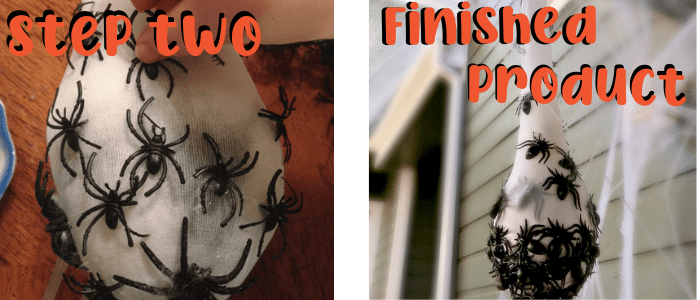
Now you’re going to take your remaining spiders and your hot glue gun, and individually glue the spiders all over the bottom of the egg sack until it is covered. Now, start glueing the spiders up the sides of the sack until you’ve reached the top of the “sack”.
PRO TIP: Really saturate your spiders with the glue, and do your best to arrange them in a realistic way.. You want it to look like they are crawling out of the sack. Let dry for at least 2-4 hours to ensure everything is completely dry and set in place. Once your egg sack is dry you can hang it from your ceiling or from your porch. This is one of those quick DIY Halloween crafts that will get your home looking like a Halloween Town.
Firefly Jars
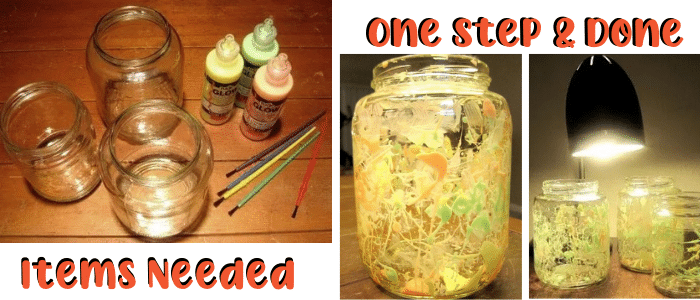
Who doesn’t love fireflies? Let’s make some Glow in the dark fireflies jars so you can decorate to look like a late Autumn evening. This is a simple activity that only needs a couple of supplies to make a beautiful addition to your Fall decor. You’ll need glass jars to start, now these can be mason jars, old spaghetti sauce or pickle jars, just make sure you clean them out REALLY well if you are reusing old jars. Then just some glow paints and paint brushes.
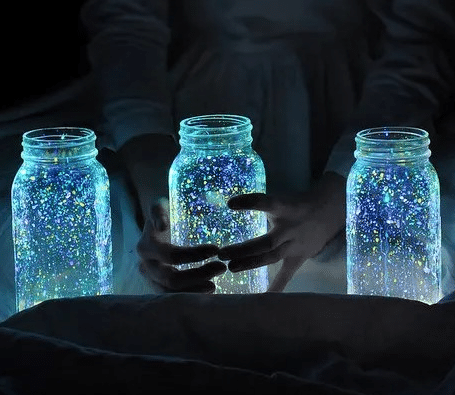
Start by dipping your paint brush into the paint, you’ll want a nice even coat on the brush. You don’t want any big globs on the brush.
Now hold your brush at least half way down or close to the other end and put the paint end down into the jar without touching the sides. Now the fun part! Tap the brush back and forth against the top rim of the jar. This will give you a splatter effect to look like a jar full of fireflies. Make sure to turn the jar as you are doing this so you get that splatter effect on all sides.
Now you can do this again with new brushes and different colors to get the desired coverage. Once you have the effect you want with as many colors as you want, allow your jars to dry completely.
I bet those jars look beautiful! Now put them under a light to absorb as much as possible, come night time you’ll have a jar full of fireflies. Easy-Peasy & Simple as pie! Now you have 3 DIY Halloween crafts to do with your family this Halloween!
For more Halloween fun, check out this weeks Recipe of The Week: Spooktacular Treats!
Advertising Disclosure: This post may contain promotional links. I'm A Proud Momma may be compensated if you use these links.



[…] Fill it with candy for your kids–or nips for adults! You can even use our instructions for paper mache pumpkins to use as the pinata for an extra activity ! Wooo! Twice the […]